product search
Indoor PlaygroundNinja WarriorOutdoor PlaygroundTrampoline
search

To measure your trampoline for a net, you need to actually get these key data: the outer diameter of the steel frame, the number of columns, the style of the columns (straight, curved or arched), and the height of the columns.
Don’t underestimate these four factors, they directly determine whether the net you buy can be installed, and whether it can really play a protective role after installation. For a rectangular trampoline, measure the length and width of the frame.
This video demonstrates how to measure your trampoline for a net:
Let me tell you in detail how to operate.
In order to buy a suitable replacement net, you must measure the metal structure itself.
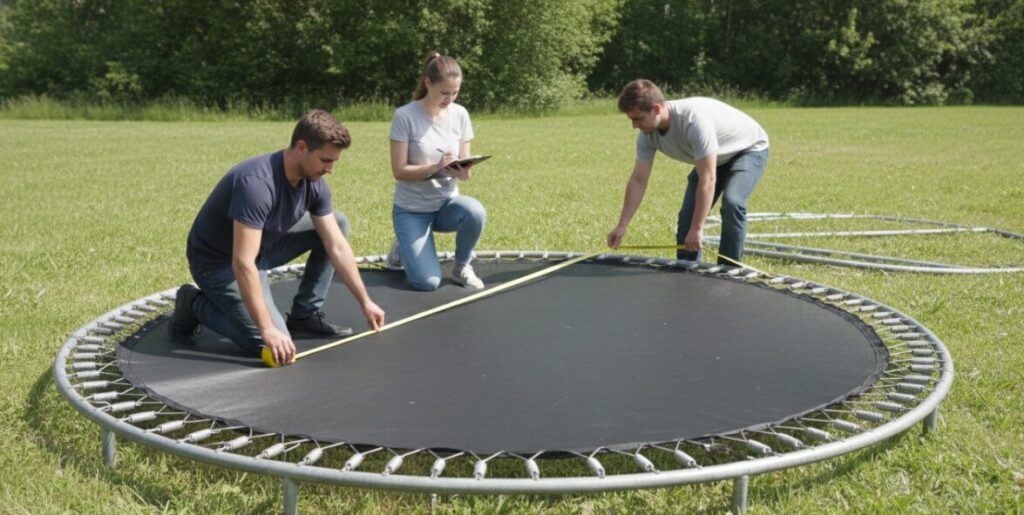
For circular trampolines:
Hook the tape measure at the outermost edge of the metal frame and pull it through the center of the trampoline until it reaches the outermost edge on the opposite side.
Why measure it twice? Here’s a detail: Steel frames tend to deform slightly after a long period of stress, becoming a bit elliptical. For the sake of accurate data, I suggest you measure from 12 o’clock to 6 o’clock, and then from 3 o’clock to 9 o’clock.
Average: If you measure one is 14 feet 1 inch and the other is 13 feet 11 inches, then its true specification is 80% of the standard 14 feet. Most purse seine nets on the market are also sold in standard sizes of 8, 10, 12, 14 or 15 feet.
For rectangular and oval trampolines:
The path is similar, but you need two exact numbers. measure the full length from the outer metal edge to the outer metal edge, and measure the full width. Don’t guess-a 9x 12 net is definitely not installed on a 10x 14 shelf, hard loading is only bad.
This video shows how to measure the frame of your trampoline:
The size of the frame determines how “wide” the net is, but the configuration of the column determines how the net should be “hung”. If this step is wrong, you either can’t fit it at all, or it is loose and very dangerous.
Walk circles around the trampoline and count how many vertical fence rods extend from the legs.
6 Pillars: Common on 8-to 12-foot trampolines.
8 Pillars: Common on 12-, 14-and 15-foot trampolines.
4 Arches: Some trampolines use inverted U-shaped arches instead of independent poles (this is usually equivalent to 8 connection points).
Discover endless fun and spark imagination! Our indoor playground products create a safe, exciting paradise for children. Experience boundless joy now!
Embrace adventure and fresh air! Our outdoor playground products offer thrilling, safe experiences for kids to explore, play, and grow. Unleash the fun outside!
Poles (Straight): This kind of pole is straight up and down. The net is usually slipped in through a “sleeve” or strapped to it.
Curved Poles: The top of the pole bends toward the center of the jumping pad. The net is generally hung at the top bend.
Arched Poles: Looks like an inverted “U. The net is usually fixed to the top of the arch.
Outward expansion/inclined rod : This kind of rod is inclined outward, usually with a circle of glass fiber rod on the top of the net.
Although the frame size is the core, I suggest you measure the height of the column as well, which determines how “tall” net you need.
Put the base of the tape measure on the metal guide rail of the trampoline frame (that is, the position where the spring is hung), and measure directly vertically upward to the top of the fence rod.
If the net is short and the bottom cannot be reached, there will be a gap left, which is not safe. If it is too long, the net will hang down like a face pocket, which is ugly and cannot provide the proper tension buffer.
What the top of the column looks like directly determines how the net is fixed. Before placing an order, you have to look closely at the top of the pole:
Casing : Is your old net directly on the pole like a sock?
Straps/Ties: Is the net tied to a simple cap?
Bolts/Handles: Some nets have a buckle that needs to be hung on a special bolt or handle on the top of the pole.
Top Ring System: Many new trampolines now use 1 fiberglass rods to pass through the top of the net and then connect to the rod cap. If this is the case, the net you buy must have a passage for the rod at the top.
This last step is a “double insurance”. If the frame size you measured is strange and does not belong to the standard number of feet, or you are not sure if it is a metric size, then look at the cushion and spring to help you confirm the model.
Count V rings : Count how many metal triangular rings are on the edge of the mat. A standard 14-foot trampoline, for example, usually has 72, 88 or 96V-rings.
Quantity spring : Remove a spring and measure its length from hook to hook in its natural state (don’t stretch). The common ones are 5.5 inches, 7 inches or 8.5 inches.
By combining the frame diameter, the number of posts, the post style and the spring details, you can hardly buy the wrong one, and you can definitely choose the safe and secure replacement net.
Author: David Miller
With over 10 years of experience in outdoor recreational equipment, I specialize in trampoline safety and maintenance. I have helped thousands of families replace their enclosures correctly. I hope to simplify technical measurements so you can get your trampoline back in action safely and quickly.